Brunch at Five Leaves
/Finally, what appears to be summer is here in NY.
Photos taken with Sony A7 + Summicron-M 35mm f/2.
Finally, what appears to be summer is here in NY.


Photos taken with Sony A7 + Summicron-M 35mm f/2.
This winter brought forth bone chilling winds and unloaded more snow than we've seen in our accumulated 3 years living in Brooklyn. It wasn't the rain, hail, or snow that made us realize our sudden need for paw protectors however. It was the truckloads of salt that the city dumped onto our streets!
In an effort to stay true to our Shibas' "natural" selves, I walked with their bare paws only to be met with 3 legged hopping or alternating paw jumps. It was the morning that our macho man Shio held his front paw up while Shiba screaming for 10 seconds in the neighborhood that I agreed that something had to be done about their paws. We had only been outside for 2 minutes and walked 2 blocks when he started his horrific screams.
Last week, I posted a series of photos on my instagram account (video, video) of our dogs unhappily having their paws covered with brightly colored disposable reusable booties by Pawz. They were the only ones carried by our local pet shop because they are considered the best in the market for paw protection.
About Pawz
Pawz dog boots are biodegradable and made with natural rubber and come in sizes ranging from Tiny (XXXS) - XL. There's a convenient printable sizing chart on their website but more on that later. Colors are adorably coordinated with the company's logo and each color represents a specific size. If you want to match your dog's coat or collar colors, you might be out of luck though they recently started offering all sizes in black. The company website describes the design as the "most natural-feeling boot" because the dogs can still feel the ground that they are walking on without soles. Three sets (12) boots retail for $14-$16 online and in stores, at an average of $1.25 per boot. Pawz boots are proudly made in USA.
Sizing
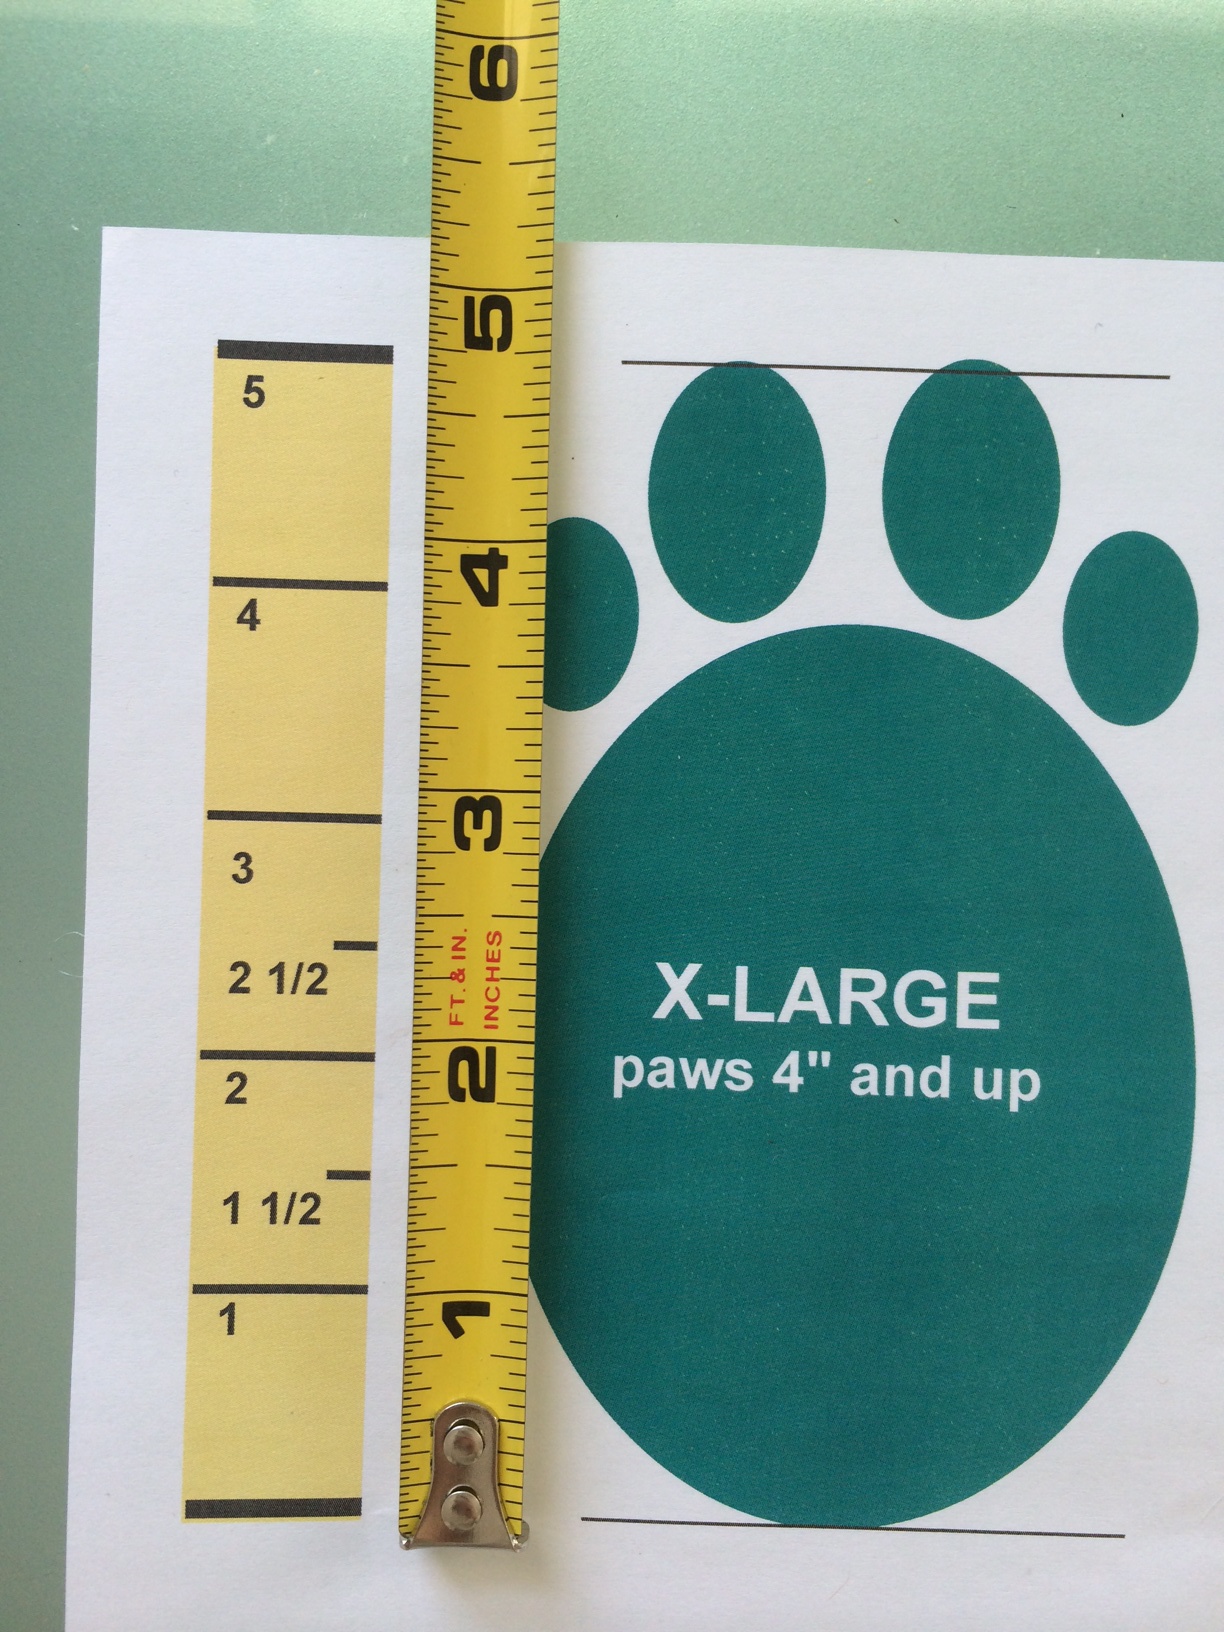
Pawz provides a printable size chart online that helps you choose the correct size for your dog's paws. The chart includes a short ruler on the left size and paw print matchup sizing color coded to the actual boots' colors.
We printed out the size chart directly from the website and compared it to an actual ruler. There is a slight 1/16" difference between Pawz 1" and actual 1" and the cumulated difference adds up to 1/4" once you get to 5". Something to keep in mind if you are using the Pawz website printout.
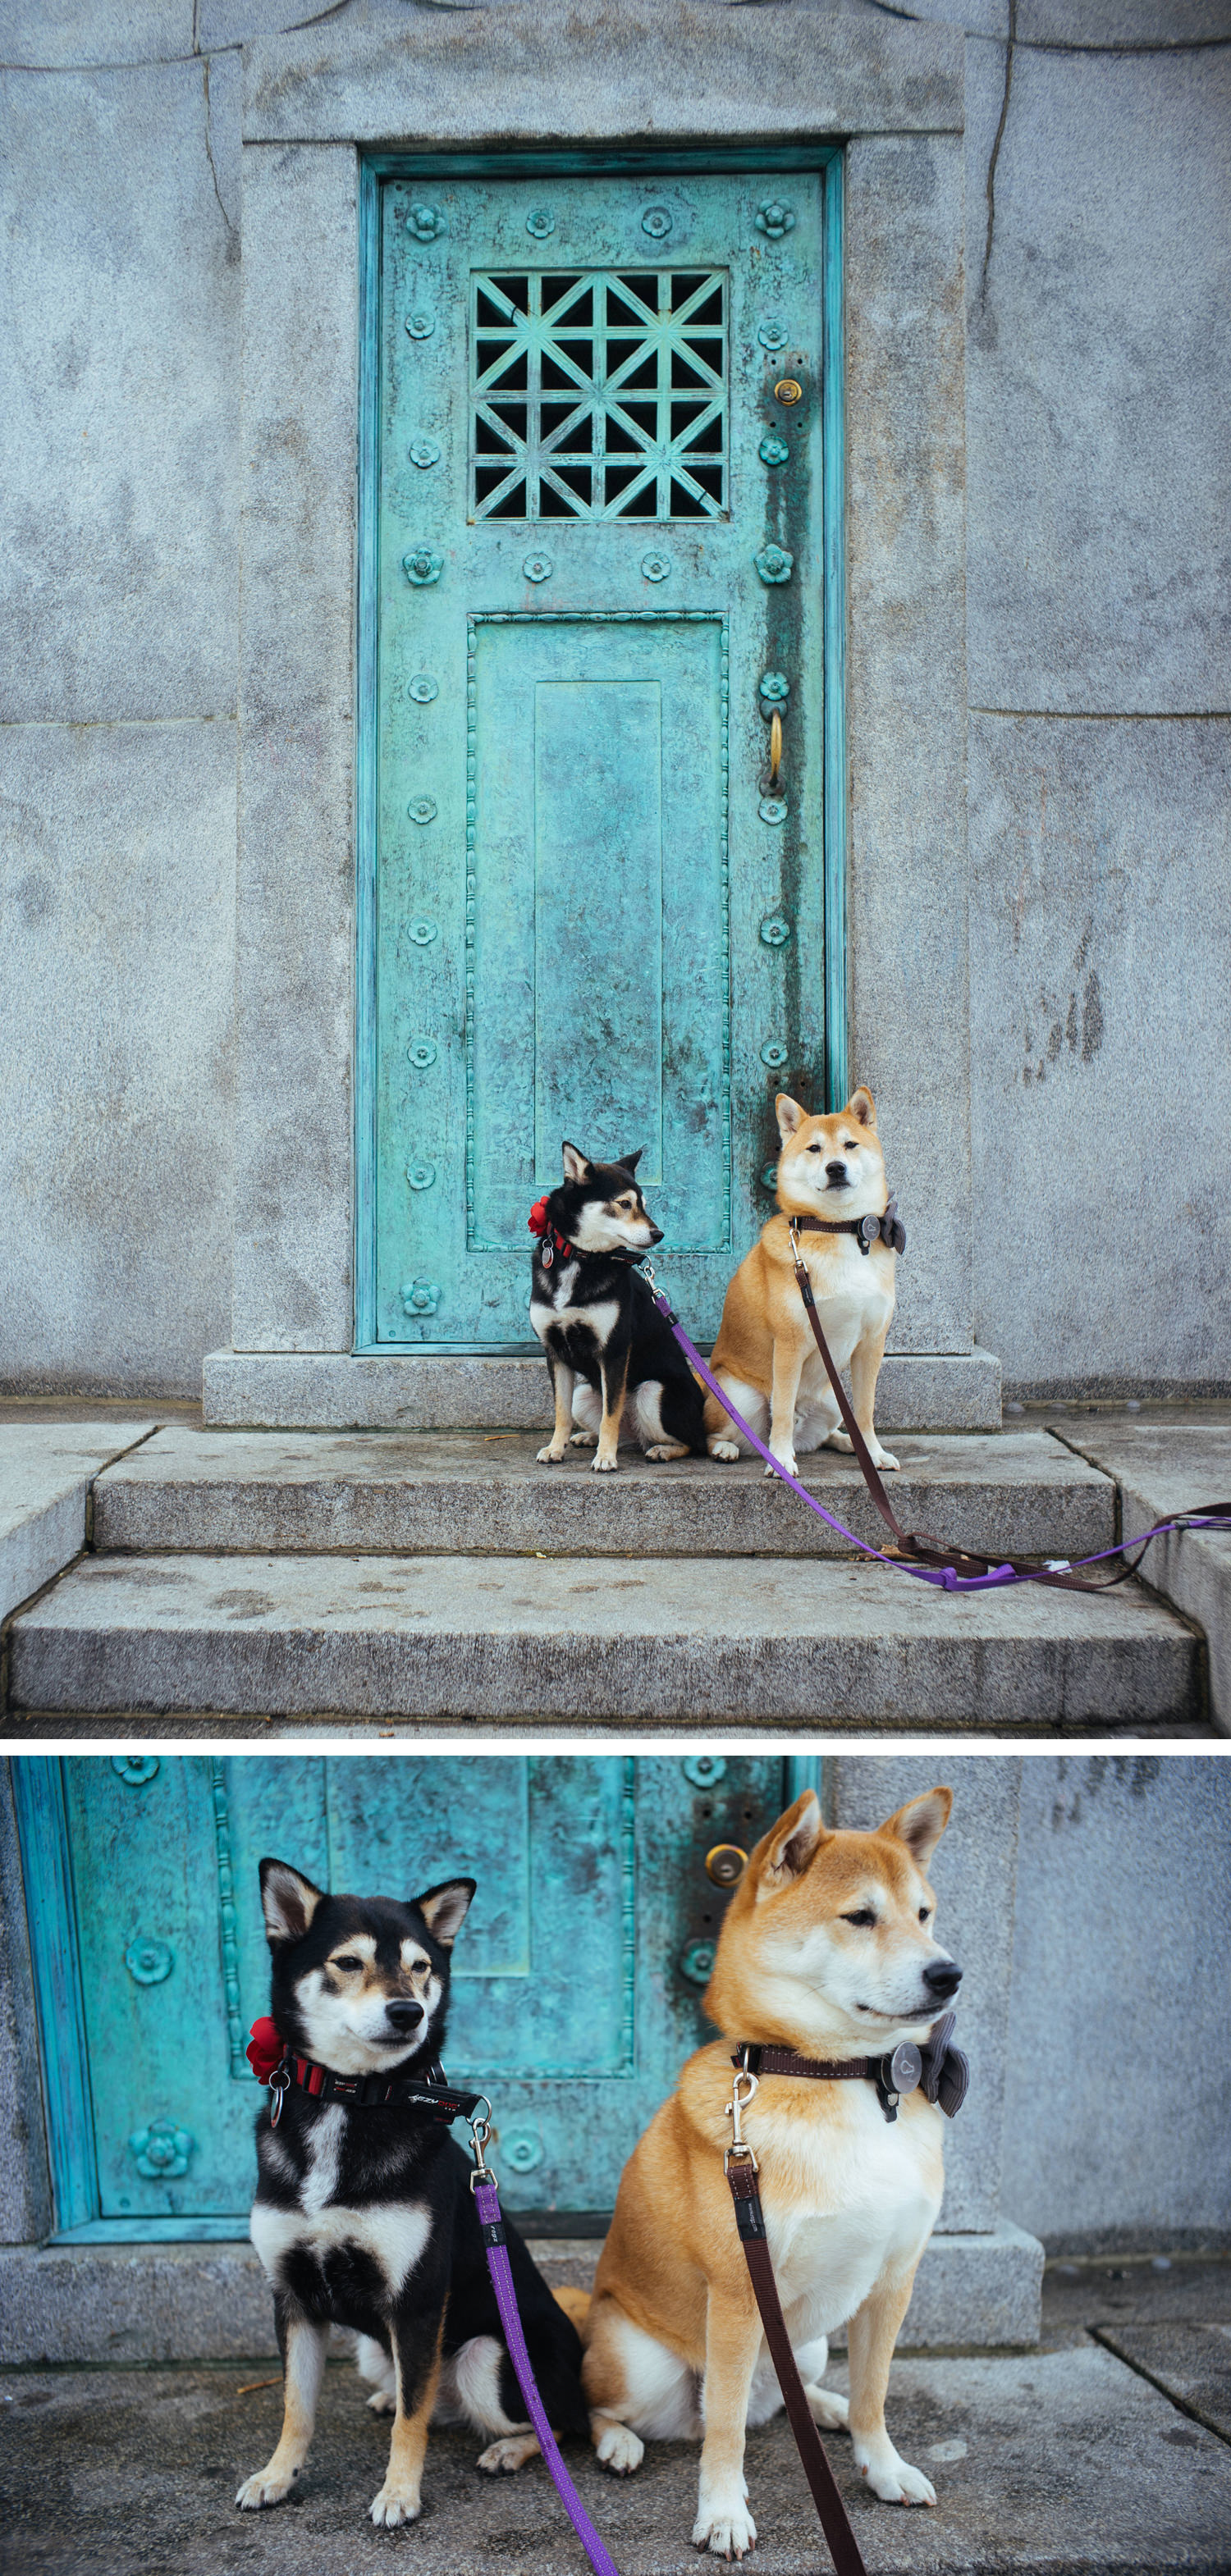
Shio measured between 2-2.5" from edge of paw pads to end of nail and Emi came in at 2". Confirmed this by comparing each Shibas' paws with the handy dandy paw print sizing on the printout. We chose to go with XS and S for our dogs. We considered buying all black booties for the New Yorker in us but decided on the whimsical colors. Our daily walks are met with a lot of pointing and giggles at their new footgear.
If you decide to go into a pet supplies store and buy Pawz last minute, each size has their own chart on the back of the packaging.
Packaging
Speaking of packaging, I'm a sucker for considerate packaging design and Pawz has nearly achieved that. Each Pawz box cover is designed to be reused and stackable by indenting inwards - perfect for multiple dog households and saving for annual winter use. The outside labeling is colorful and informational (testimonials and size chart) for potential consumers perusing the paw protection aisles of pet supplies stores. In contrast, the inside of the packaging is a simple black text with simplified instructional drawings on ideal scenarios of how to insert your dog's paws into their boots.
Putting on the Pawz
In an ideal world, the Shibas would put their own booties on and we'd be out the door. However, nothing in the world of Shibas is easy. Luckily ours have their paws handled often for weekly nail trims and post-walk wipe downs so putting on the boots was easy, relatively speaking.
The best way to stretch out the opening of the boots is exactly how the graphic instructions from Pawz shows: Use two fingers on each hand to stretch the top of the boot very wide. The wider you stretch, the easier it is. I also separate the two fingers in each hand to create a v-shape to open it wider. We use different techniques to put boots on for each dog. It's easiest to have Shio standing while we dip his paws in whereas the best option for Emi is to lie her on her back with her paws up to dip the boots onto her paws. Both options yield unhappy Shibas.
Test sizing of the boots by pulling on the ends. If the boot slides off, it is too big.
Tips: Keep treats handy. Back paws are easier than front paws. Don't pull up the boots like a tube sock - it should at least cover the paw pads and be sure to leave wiggle room at the ends for the toes to spread when on walks.

The first time we put on their booties, we had two mopey dogs standing with their hind leg up like a statue. After throwing higher valued treats on they begrudgingly and awkwardly walk/hopped over to retrieve them.

There were times where they would freeze and all the food in the world wouldn't motivate them (as shown below).

Removing the Pawz
After each walk, we remove each boot by pinching the opening upwards and sticking our thumb underneath the opening and sliding the boot off. Our dogs' paws are cold after the walks and pulling them off seems painful for them.
Caring for Pawz
After each day I take the booties to our bathroom sink and rinse off all the dirt and sale it accumulated during walks. That is a good time to check for any holes.
We hang them onto straws in a disposable cup to dry. We added a rock onto the bottom of the cup to weight it down so it doesn't topple over. They look like colorful little rubber lollipops!
To also add to the life of each boot, we rub corn starch onto the boot with our fingers. The powder prevents the rubber from sticking to itself. You can also use talcum powder or baby powder.
So far we've had the boots for two weeks and have only had to replace one. Shio's are all intact but Emi likes to run around and has poked holes through one with her nails. We are happy with our purchase and would consider buying another pack once our current ones are depleted.
As a tip, I have also heard of dog owners purchasing regular rubber party balloons and trimming the edge of the opening off to use those as boots. It is a much cheaper option though we have not tried it.
Thanks for reading!
Photos taken with Sony A7 + Summicron-M 35mm f/2.
Photos taken with Sony A7 + Summicron-M 35mm f/2.
Day 3 - Monday, January 20:
Last day in Montauk!
We went out for a pancake breakfast and headed out for our last adventure before driving home.
The destination was Camp Hero State Park, the former location for Montauk Air Station and rumored to be location for military experiments one of which includes time travel! This park was donated to the state after and opened to the public in 2002. We parked at the first fisherman's parking lot and looked over the hoodoo cliffs. The drop off for the cliffs were steep so it is advised not to stand to close to the edge!
We then found our way to the Battery 113 trail and hiked for 20 minutes to reach Battery 113 and the radar tower. The trail was not very worn but there were clear trail markers (the photo below of me with the dogs shows the bright orange dot tacked onto the tree). At the end of the trail was Battery 113, built during WWII as a concrete coastal gun battery. Nearby was the AN/FPS-35 Radar, the centerpiece of the Montauk Project conspiracy. The radar was decommissioned but not torn down because boaters preferred it was a landmark over the Montauk Point Light.
We took the bluff overlook path back to our car's location hurriedly after other visitors arriving at Camp Hero asked us if we saw zombies.

Montauk was one of the best road trips we've taken so far and we were sad to go so soon. We left much to explore and can't wait to go back!
Posted details about the first two days in Montauk:
Montauk Day 1
Montauk Day 2
Photos taken with Sony A7 + Summicron-M 35mm f/2.
Day 2 - Sunday, January 19:
After a quick morning breakfast, J and I drove out to Montauk Point State Park located at "The End" of the southern fork of Long Island on NYS Route 27. Normally there is an $8 parking fee but we found that we could park for free. There were only 7 cars present when we arrived but normally this attraction is packed with tourists during the warm season.
Our primary goal for this visit was the see the lighthouse while letting the dogs explore the park. This state park allowed dogs on its premises as long as they were leashed but do not allow dogs to enter the lighthouse or museum. We were fine with wandering without going inside the buildings. When we arrived, the gates to the museum and lighthouse were closed anyway so we walked the surrounding area for an hour.
The Montauk Light is a lighthouse that was authorized by the Second United States Congress, under George Washington's presidency term. Construction of the lighthouse was completed in 1796 and today it stands as the fourth oldest working lighthouse in the states. More information can be found on the official website: http://www.montauklighthouse.com

After our visit to the lighthouse we took a short 5 minutes drive to Shadmoor State Park. The 99 acre park is named for the shadbush that grow there Inside there is a short 1 mile hike that we walked with some scenic overlooks along the path. The path was well worn and we didn't have any trouble navigating around. Parking is free at this park and leashed dogs are welcomed. More information can be found on this site: http://nysparks.com/parks/16/details.aspx
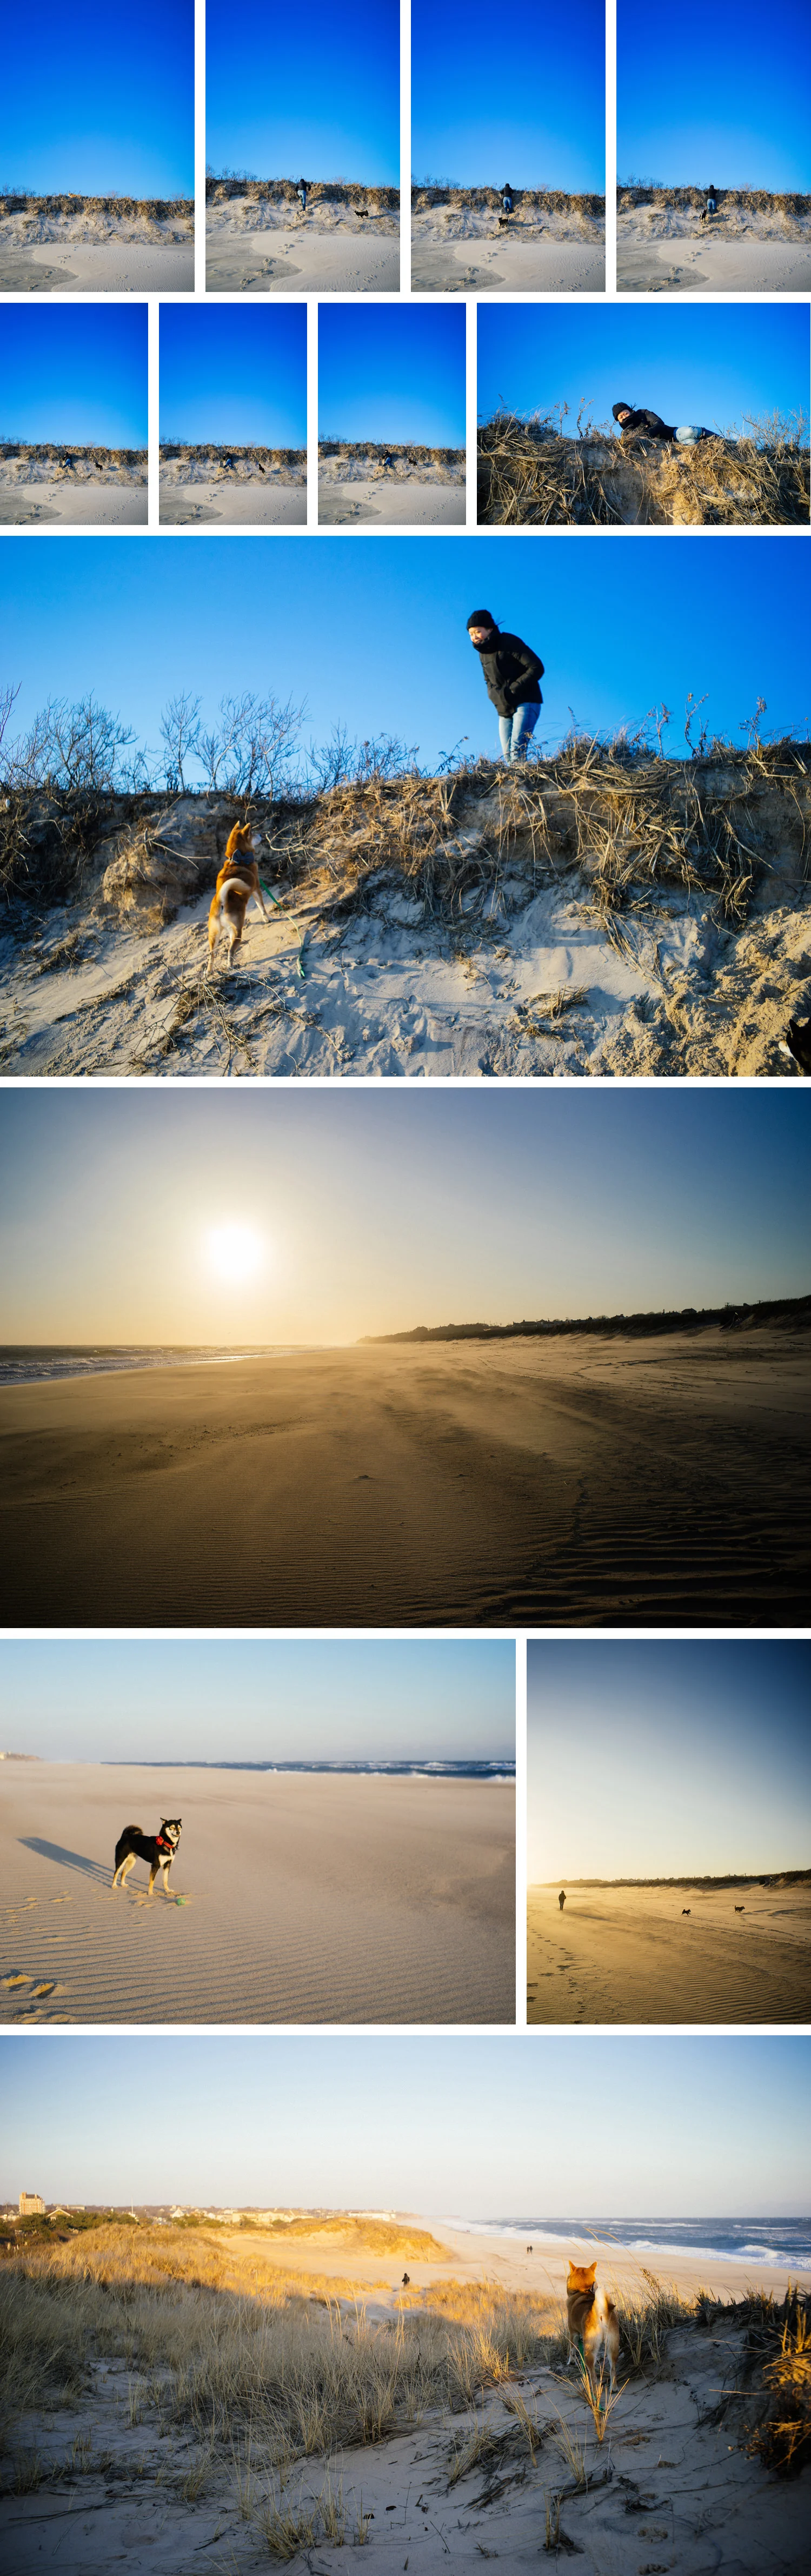
After the hike at Shadmoor State Park, we drove back to the motel and let our Shibas rest while we drove out to East Hampton to wander the town and shop. Upon our return, Shio and Emi were still filled with energy so we took them back out to Kirk Park Beach and they ran themselves silly while the sun set.
J thought it would be funny to post the sequence of photos he caught of me running up the dunes and falling to successfully reach the top. Instead I tumbled down like a sack of rice two times before hauling myself clumsily over the edge of the dune. Luckily no one else was there to witness this!
We ended the day with a dinner at Swallow East Restaurant (try the short rib ravioli).
In case you missed it, here's the post for our first day in Montauk: Montauk Day 1
Photos taken with Sony A7 + Summicron-M 35mm f/2.